New York/ Adobe light room

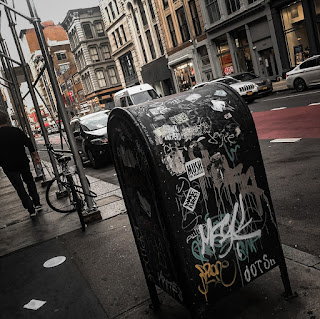
 So, if anyone knows me they would know that I am in love with New York. About a year and half ago my mom decided she would finally take me there. As a result I photographed the whole city, and I thought I would share some with you! 


I photographed all of these using my phone camera, usually in portrait mode to have a focal point. Even though I did not have a fancy camera at the time I still believe I created some interesting photos. 

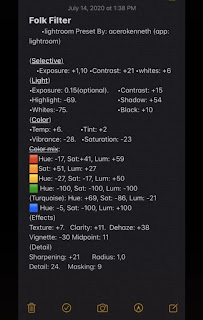
All of these photos I edited using Adobe Photoshop: Lightroom. These photos in particular I used a preset created by a photographer on Instagram who’s name I have completely lost from my phone. However, I do have the original preset photograph that shows you how to get the same effect.

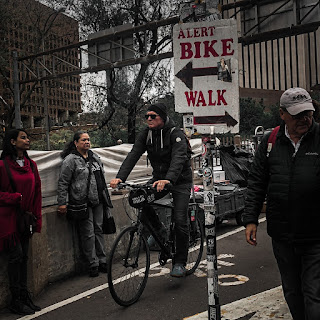
This is probably my favorite effect to use on photos, as you can probably tell from my main Instagram. However, the filter does create some artifacts you can see in the photos above. This can be avoided by changing detail and sharpening levels, but I quiet enjoy the grainy look it gives to the industrial city of New York.

Comments

Popular posts from this blog

The Invisible Man

Above are my attempts at making will invisible. the last photo in particular was hard to pull off as I had to completely copy and paste will onto the background photo to move him around because the two images did not match up.  

Assignment 2: DOF & Motion

  For this assignment, since we were locked in due to the snow, me and my roommate Madison decided to use her as my model in a series of photographs. Here is the result. Depth of Field: With these photos, I experimented with depth of field. In the first Photo my goal was to show a shallow depth of field in showing the detail of the trees and Madison blurry in the background. I edited this photo by adding yellow to the highlights, green to the shadows, and upping the saturation of the red in her jacket. The second photo I tried keeping the depth more mid ranged to deep. Keeping the edge of the building in focus and the sky and trees in blur. I edited this photo by adding brown to the shadows and blue in the highlights. Then I added saturation in red and yellow to bring out the orange in the building.  In this photo however, I wanted the blur to be gradual. starting with a shallow field, my goal was to slowly see the blur increase as it went further into the distance. You can se...

Computer Art meets Photography

 Below are graphic posters I designed for last year's art show but never completed. I used techniques learned in both this class as well as the Digital Photography class. Chernobyl - 2021 Grettel - 2021   Grudged - 2021 Some different techniques used in these images are brush strokes with dogging and burning, filters, shapes, distortion, and more. The black and white images gave many more options to work with.